Title here
Summary here
After reading this guide, you’ll be able to:
Before you start using Available Serves, make sure you have:
Available Serves helps you track exactly how many portions you have left for specific menu items—and updates all your tills in real time as sales happen.
Here’s a real-world example:
The Harbour Grill prepares 30 portions of their Chef’s Special each day. When a server adds the special to an order on Till 1, all the other tills immediately see the count drop to 29. When the kitchen runs low, they can set the count to 0 so staff stop selling it.
| Use It For | Real Example | Why It Helps |
|---|---|---|
| Daily specials with limited quantities | Only 15 seafood risottos prepared today | Stops overselling and customer complaints |
| Premium items with limited stock | 20 wagyu steaks available tonight | Kitchen never runs out unexpectedly |
| Portioned ingredients used in multiple dishes | Half racks of ribs used in 3 different meals | Counts update automatically across all dishes |
| Fresh prep items made in batches | 50 house-made salads prepped each morning | Accurate tracking throughout the day |
✅ Best practice: Use Available Serves for any item where you need to stop selling at an exact count. Don’t use it for unlimited items or things you track separately in your inventory system.
Available Serves uses a primary till (your master device) that keeps track of all your counts and shares updates with every other till instantly.
| What Happens | Behind the Scenes | Example |
|---|---|---|
| You set a count | Primary till stores the number and tells all tills | Chef enters 30 specials available |
| Server adds item to order | System reserves 1 serve (count drops on all tills) | All tills now show 29 available |
| Order is cancelled | Reservation is released (count goes back up) | All tills show 30 again |
| Order is completed | Reservation becomes permanent (count stays down) | Count stays at 29 |
💡 Tip: Think of it like a reservation system—when someone adds an item to their cart, it’s temporarily held. If they don’t complete the sale, it’s released back.
Real-world example:
Joe’s Steakhouse sells a “Surf & Turf Combo” that uses 1 steak + 1 lobster tail. Here’s how the system calculates what’s available:
When 1 combo is sold:
📖 What this means: The system always shows the lowest available ingredient. You’ll never sell a combo when you’re out of one component.
Example:
The Beach Cafe makes a “Ribs Platter” using 2 half racks. They have 40 half racks in the kitchen, but they only made 15 portions of their special BBQ sauce.
✅ Best practice: If a special ingredient limits your dish (like a house-made sauce or garnish), set a direct count on the finished dish itself.
🚨 Heads up: Available Serves won’t work until you designate one till as your primary device. This takes about 2 minutes in your Back Office.
Pick a till that:
| Setting | What to Enter | Where to Find It |
|---|---|---|
| Primary ID | The device ID of your chosen till | On the till itself in device settings |
| Primary IP/Hostname | The network address of the till | See options below |
You need a fixed address for your primary till so other tills can always find it:
| Option | What It Does | When to Use It |
|---|---|---|
| Static IP | ||
(e.g., 192.168.1.50) | Assign a permanent IP address that never changes | ✅ Recommended for most businesses—most reliable option |
| DHCP Reservation | Tell your router to always give the same IP to this till | Good alternative if you can access your router settings |
| Hostname | ||
(e.g., till-01.local) | Use a device name instead of a number | Only if your network has reliable name resolution |
⚠️ Important: Don’t use automatic (dynamic) IP addresses—they can change when the till restarts and break your connection.
🔴 Critical Step: Connect Primary Till to Itself
The primary till must connect to its own Available Serves service. It’s possible for the till to run without being connected.
To verify: Check the connection status on the primary till after setup and after any restarts.
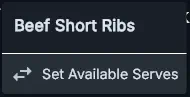
When to use this: You’re starting the day and want to set how many portions you have.
Example: The Riverside Bistro prepped 25 portions of their fish special.
25 on the number padResult: The number 25 appears at the top-left of the button. All tills now show this count.
💡 Tip: This overwrites any existing count. If you want to add to what’s there instead, use the Add/Subtract option below.
When to use this: The kitchen just prepped more portions, or you need to remove some that were damaged.
Example: You currently have 15 portions, and the kitchen just made 10 more.
10 on the number padResult: Count changes from 15 to 25.
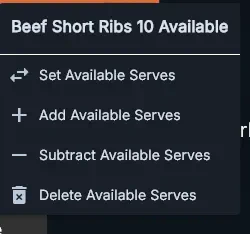
To subtract: Follow the same steps but choose “Subtract” instead.
When to use this: You’re sold out or the item is temporarily unavailable.
Example: The Harbour Grill ran out of their special mid-service.
0 on the number padResult: The button shows 0—staff can no longer add it to orders.

✅ Best practice: Train kitchen staff to set items to 0 as soon as they run out. This prevents servers from promising food you can’t deliver.
When to use this: An item is back in full stock and no longer needs tracking.
Example: Yesterday’s special is now a regular menu item with plenty of stock.
Result: The count disappears and the item can be sold without restrictions.
⚠️ Important: At the start of each trading day (the time you set in your till settings), all serve counts automatically reset to unlimited.
Example: If your trading day starts at 6:00 AM, all counts set yesterday are cleared at 6:00 AM.
What this means: You’ll need to re-enter counts each morning for daily specials.
When you run a Z Read (shift report) on your last connected till, you’ll see this prompt:
“Reset Available Serves?”
| Choose This | What Happens | When to Use |
|---|---|---|
| Yes | All serve counts are immediately cleared | End of service, closing for the day |
| No | Counts stay active | Mid-shift report, or you want counts to carry over |
💡 Tip: If you accidentally reset, the Z Read report shows what your counts were. You can manually re-enter them from the report.
Q: Can I use Available Serves without enabling Mesh?
Yes. Available Serves works on its own—you don’t need Mesh active (though Mesh does help with other sales data syncing).
Q: What happens if the primary till loses power?
Serve counts will stop updating across tills until the primary till reconnects. Always use the most reliable till as your primary.
Q: Do I need buttons for every ingredient in a recipe?
Only if you want to set direct counts on those ingredients. The system calculates recipe availability automatically based on any components that have counts set.
Q: Can I set serves from any till?
Yes—once the primary till is configured, you can manage serve counts from any connected till.
Q: Why is my count different than what I entered?
The displayed count = Total you set – Items currently in open orders. If 3 servers have the item in active sales, your count will be 3 lower than what you set.
Now that Available Serves is set up, here’s what to do:
✅ Best practice: Start with just your daily specials for the first week. Once your team is comfortable, add more limited items.