Title here
Summary here
After reading this guide, you’ll be able to:
Before you start, make sure you have:
Product tags are your way of organising products into categories. Think of them like folders on your computer - you can create main categories and then nest subcategories inside them to get as detailed as you need.
Tags help you in four key ways:
| Use | What it does | Example |
|---|---|---|
| Sorting | Keep your product list organised | Group all “Coffee” items together |
| Reporting | See sales by category | View total “Food” sales vs “Drinks” sales |
| GST/Tax | Apply correct tax rates | Mark items as “GST Free” or “GST Included” |
| Kitchen Printing | Send orders to the right station | Print “Mains” to the kitchen, “Drinks” to the bar |
Tags are organised in a tree structure with multiple levels. Here’s what that means:
Example: The Beach Cafe’s tag structure
REPORTING (Level 1)
├── Food (Level 2)
│   ├── Breakfast (Level 3)
│   │   ├── Eggs (Level 4)
│   │   └── Pancakes (Level 4)
│   └── Lunch (Level 3)
│       ├── Burgers (Level 4)
│       └── Salads (Level 4)
└── Drinks (Level 2)
    ├── Coffee/Tea (Level 3)
    └── Soft Drinks (Level 3)
📖 What this means:
✅ Best practice: When you assign a Print Header to a parent tag (like “DRINKS”), all child tags in that branch automatically use the same Print Header. This saves you time!
🚨 Heads up: You must have level 1 tags called REPORTING and GST in your system. Don’t delete or rename these - they’re required for the system to work properly.
There are two ways to add tags, depending on what you’re creating:
Use this method when you’re creating a brand new main category (Level 1 tag).
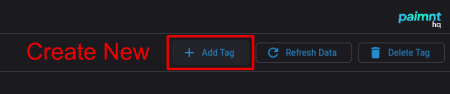
💡 Tip: Most venues only need a few Level 1 tags. Think of these as your major divisions like “REPORTING”, “GST”, and maybe “RETAIL” if you sell merchandise.
Use this method when you’re building out your category tree (adding Level 2, 3, 4+ tags).
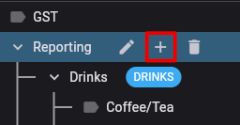
💡 Tip: This is the fastest way to build your tag tree. You can quickly add multiple subcategories without having to select the parent each time.
⚠️ Important: All tags used for sales reporting should be children of your REPORTING tag. This keeps your reporting clean and accurate.
Let’s say you run a pizza restaurant and want to track sales by category. Here’s how you’d set it up:
Step 1: Create your main food categories under REPORTING
Step 2: Break down pizza into types
Step 3: Organise your drinks
Step 4: Assign Print Headers
Now when you run reports, you can see sales by pizza type, compare food vs drinks, and orders automatically print to the right stations!
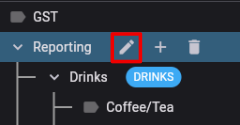
Once you’ve created tags, you can rename them or move them around. The great news? When you change a tag, all products using that tag automatically update - you don’t have to change anything on individual products.
The easiest way to reorganise your tag tree is to drag and drop tags directly in the tree view.
💡 Tip: To cancel a move while you’re dragging, just move your mouse back over the tag you’re moving or over the sidebar, then release.
⚠️ Important: Drag the tag to the new parent tag, not just to where you want it to appear on screen. The system will automatically place it in the right position under the new parent.
Print Headers control where orders print in your venue. For example, you might want all “Mains” to print in the kitchen and all “Drinks” to print at the bar.
📖 What this means: A docket or kitchen print is the ticket that prints when someone places an order. It tells your team what to prepare. Learn more: Setting Up Print Headers
✅ Best practice: Assign Print Headers to parent tags (like “Food” or “Drinks”) rather than every single child tag. All child tags will inherit the Print Header from their parent, saving you setup time.
Q: Can I delete a tag if I don’t need it anymore?
Yes, but be careful. If products are currently using that tag, you’ll need to reassign those products to a different tag first.
Q: What’s the difference between the tag tree levels?
The level just tells you how deep in the tree the tag is. Level 1 tags have no parent, Level 2 tags have one parent, Level 3 tags have a parent and a grandparent, and so on. When you run reports, you can choose which level of detail you want to see.
Q: Do I need to use all the levels?
No! Use as many or as few levels as make sense for your business. A small cafe might only need 2-3 levels, while a large restaurant might use 4-5 levels for detailed reporting.
Q: What if I move a tag that has child tags underneath it?
No problem! When you move a parent tag, all its children move with it automatically.
Q: Can I have the same tag name in different branches?
Yes. For example, you could have “Specials” under both “Food” and “Drinks” - they’re separate tags in different branches.
Now that you’ve set up your product tags, you’re ready to: