Title here
Summary here
When you ring up items on the POS, you’re building a sale. The sale tracks all the products, the total amount due, and any adjustments like discounts or tips. Once the full amount is paid and the amount due reaches $0, the sale finalizes and creates a receipt.
You can accept payment in several ways:
⚠️ Important: Once you’ve taken a partial payment, some functions like canceling the sale will no longer be available.
To pay the entire amount with one payment method:
💡 Tip: This is the fastest way to complete most sales.
To pay only part of the amount due:
< video-content src=“operations-payment-take-partial-payment” autoplay=“true” muted=“true” loop=“true” >
💡 Tip: If you have preset ‘Start Cash’ buttons configured (e.g., $20, $50, $100), just press those instead of typing amounts.
The Split Payment function button opens a dedicated window that brings together all payment tools in one place.
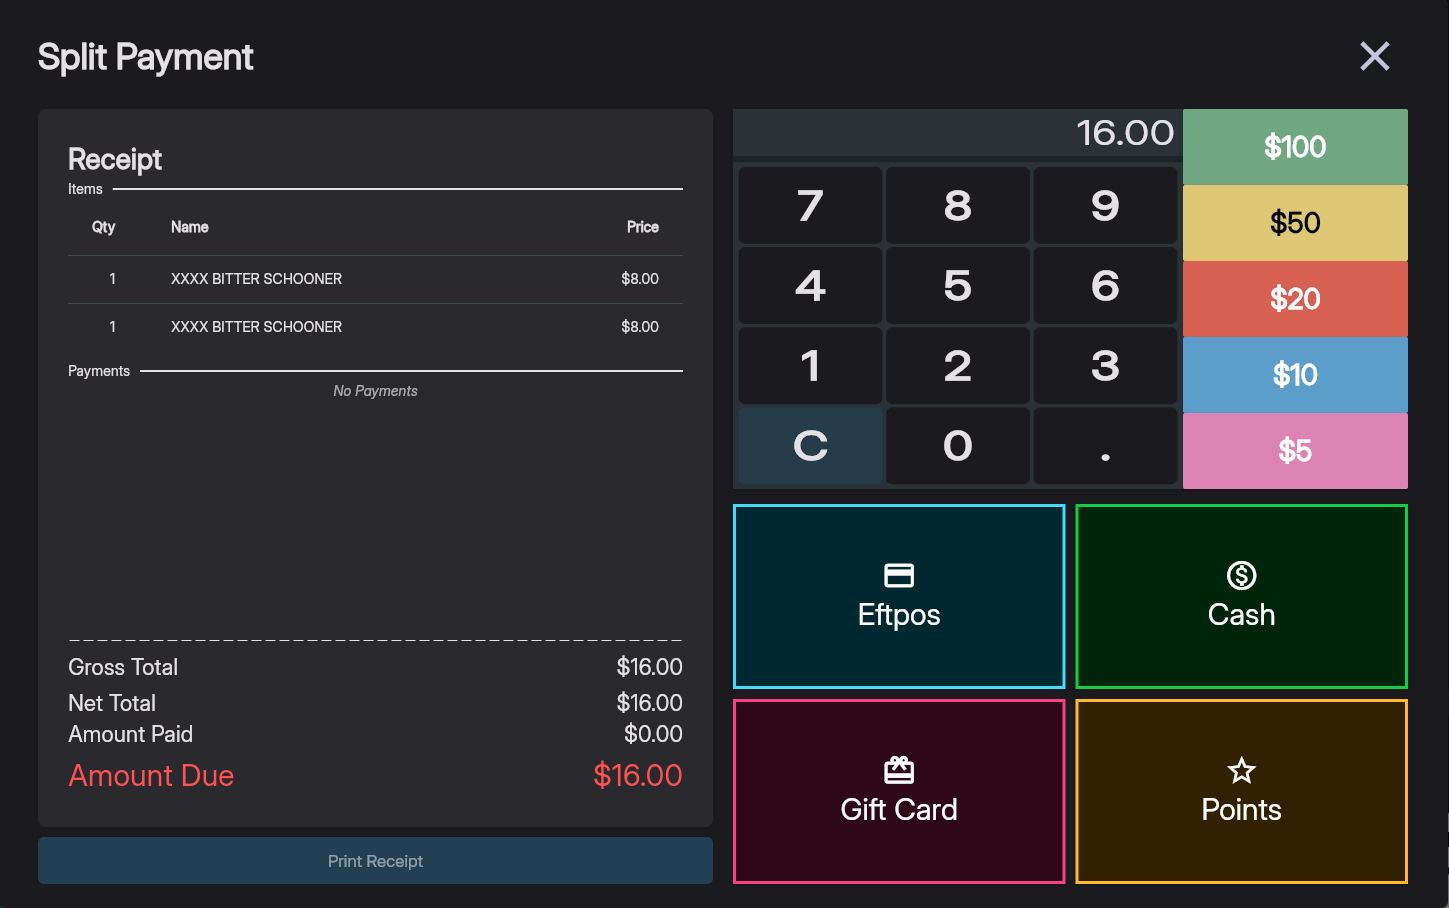
To use Split Payment:
📖 What this means: Opening the Split Payment window creates a new Payment Receipt for this sale. See Sales and Receipts for more details. The payment list on the left shows only payments for the current receipt (since you last opened Split Payment).
⚠️ Important: If you close the Split Payment window with an amount still due, it will finalize the current payment receipt (not the entire sale). The sale itself remains open until fully paid.
Your sale automatically finalizes when:
Special case: If the amount due reaches $0 through a non-payment action (like removing items or applying a discount that covers the full amount), you must press any payment button to finalize the sale.
After finalization: